
How to Create, Adjust, and Send Job Estimates and Proposals
Learn how to use the LMN estimating tool to maximize profit for every landscaping job, save hours of time creating proposals, and automatically create work plans. Below we show you how to use LMN software to create, view, adjust, and send estimates.
In this estimating guide, we’ll cover:
Advantages of the LMN Estimating Tools
The LMN estimating tool gives you a variety of advantages for your business:
- Ensure that all estimates are profitable and see how much profit each estimate makes.
- Create professional and transparent estimates faster than your competition to win more business.
- Automatically capture overhead costs in every estimate which is often overlooked.
- Save time and reduce mistakes by automatically creating detailed job plans directly from estimates.
- Apply the true crew cost per hour automatically for different jobs to increase labor pricing accuracy.
In the next sections, we’ll walk through how to use the tool to create estimates that maximize profitability. Sign up for a free estimating account above to use the tool.
Estimate Types: Standard vs Service
LMN estimating software allows you to create two different types of estimates. Generally, Standard estimates are for non-recurring projects (design-build) and Service estimates are for regularly recurring projects (maintenance).
Below are some more differences between Standard and Service estimates.
- Service estimates offer the ability to set billing types to reflect Per Season, Per Visit or Per Hour/Unit. You will be able to generate proposals to fit your billing type.
- Service estimates will calculate the total for all of your Per Season billing areas and will allow you to split this amount between your desired number of payments.
- Service estimates have Contract Start and Contract End date fields available for selection.
- Standard estimates use Payment Milestones instead of Contracts & Payments
In the next section, we’ll walk through how to set up a Standard Estimate.
Standard Estimates Tutorial
Creating a New Standard Estimate (Design-Build or Install)
There are two ways to create a new estimate. We’ll start with how to create an estimate from a new CRM contact:
- Once logged into LMN software, on the lefthand menu, go to CRM then Contacts.
- Click on the “+New” button on the righthand side to create a new contact.
- For this tutorial, enter your own name, email, address, and other information in the “Contact/Billing Info” and “Primary Contact” info. Later, you’ll send yourself a test estimate and invoice so it’s important to use your own email.
- After you create your CRM contact with your own information, there will be menu tabs toward the top that say Info, Contacts, Jobsites, Estimates, etc. Click on the Estimates tab.
- Click on the “New Standard Estimate” button on the far right.
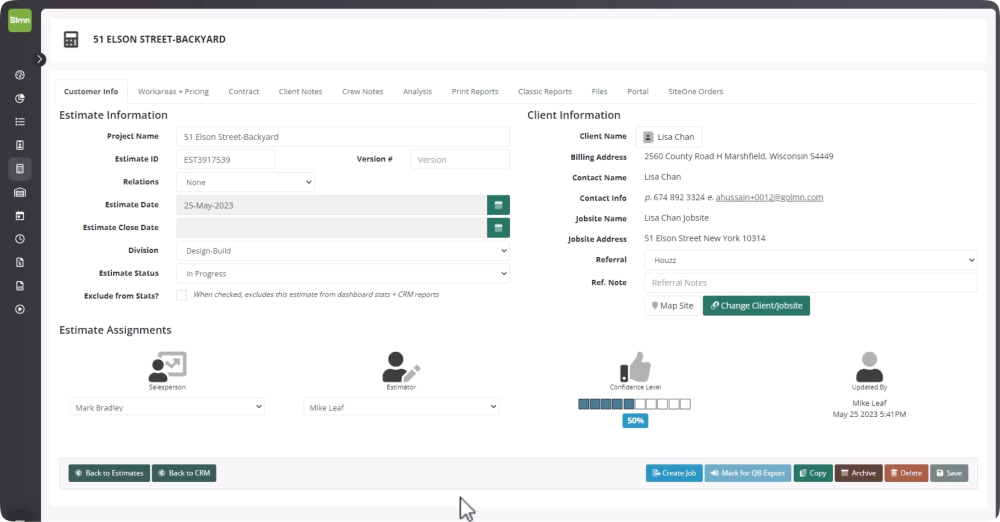
- In the new estimate window, you are able to adjust the Lead/Customer and Estimate info if necessary. Click OK to create the estimate.
You can also create new estimates by clicking on Estimates in the lefthand menu, then clicking new.
Adding Pricing and Work Areas to the Standard Estimate
Now that you’ve created your standard estimate, the next step is to add Work Areas and pricing:
- Once your new Standard Estimate is created, you’ll see a menu of tabs toward the top.
- Click on the “Workareas + Pricing” tab to start adding pricing for Work Areas or Services.
- Click on the “Add Work Area” button toward the middle-left area of the page. This will open a new Work Area window. Some examples of Work Areas are: Paver Driveway, Front Porch, Planting, Lighting, Walkway.
- Breaking down Work Areas in this way allows you to see which types of work and services are more profitable and which ones need improvement.
- Name your new Work Area and click OK to add it. Once it’s added, you’ll edit the pricing and add different items such as labor, equipment and materials.
- Once your Work Area is created, click on the “Add Items + Templates” button on the lower right hand side. This will open a window on the right hand side where you can search for items related to labor, equipment, material and more. You can also click the “New” button to create your own custom items and pricing.
- Once you’ve added some items, click the “Save” button toward the bottom. You can now adjust pricing and costs for each item.
- After adjusting your costs and prices, you are able to see estimate price, cost, and net profit at a glance. If you click on the “Analysis” tab within the estimate, you can see a more in-depth breakdown.
Create Customer Proposal from the Standard Estimate
After adding all your pricing and work areas to the estimate, the next step is to create the proposal, then send it to yourself (or your customer):
- Click on the “Classic Reports” tab in the top menu.
- In the “Report” drop down field, select the “Customer Proposal” option.
- For the “Custom Title” field, enter a title or simply type “Test Report” if you are sending yourself the proposal.
- For the “Output As” dropdown field, select the “Adobe PDF” option, then click the “Print” button, then click the “Open Report” button to download your estimate proposal.
- If you want to email or customize the proposal, click on “Print Reports” tab in the menu at the top.
- Select your report type, add your report title, add any customizations, then click the “Preview” button.
- Note: in order to email a proposal, you must setup your customer portal in the settings menu tab.
Free Live Training for Estimating Tools
LMN offers free live training sessions that show how to use the estimating tools:
- Sessions for Design/Build estimates are weekly on Tuesdays from 10am-12pm EST.
- Sessions for Maintenance estimates are weekly on Mondays from 2pm-4pm EST.